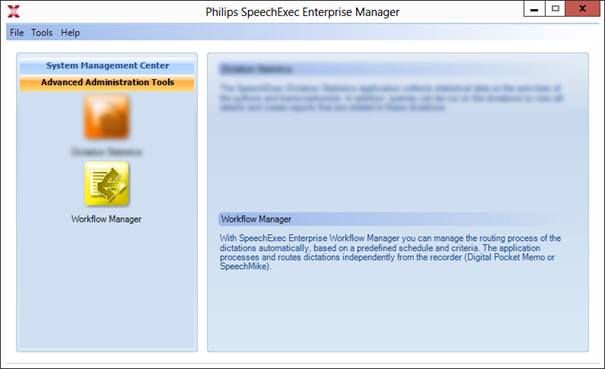
Workflow Manager
SpeechExec Enterprise Workflow Manager can manage the routing process of the dictations automatically, based on a predefined schedule and criteria. The application processes and routes dictations independently from the recorder (Digital Pocket Memo or SpeechMike). SpeechExec Enterprise Workflow Manager is a client-server application. The Workflow Manager server is implemented as a Windows service and it can be connected to more Workflow Manager Clients from different PCs at the same time. The application infrastructure ensures that if any changes have been made by one of the connected users, the changes have to be applied for the other users as well. Start the SpeechExec Enterprise Manager, select Advanced
Administration Tools and click on Workflow Manager
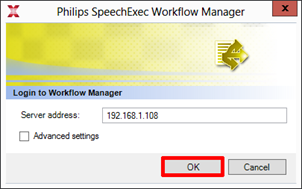
Give the server address of the Workflow Manager service and click OK. The port number is given by default 49256 for TCP or 80 for HTTP.
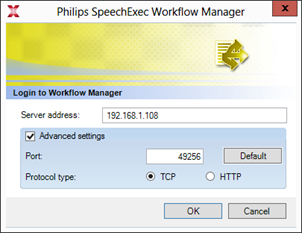
The Workflow Manager server can be accessed by the clients through TCP and HTTP protocols. HTTP protocol can be used when a user connects to the service from outside of the company domain, which is protected by firewalls. The ports through which the Workflow Manager service accepts connections can be defined through the following ways: Change port values in Registry Pass startup parameters for the Workflow Manager service Registry keys. The TCP and HTTP ports used by the Workflow Manager service are stored in the Windows Registry, under HKLM\Software\Philips Speech\WorkflowManager\Service path: WorkflowServerHttpPort for HTTP connections
(default value: 80) WorkflowServerTcpPort for TCP connections (default value: 49256)
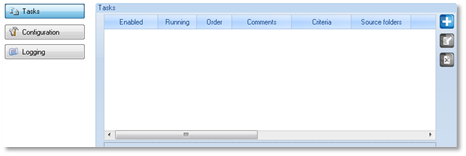
Tasks: This option allows you to manage the tasks of the application.
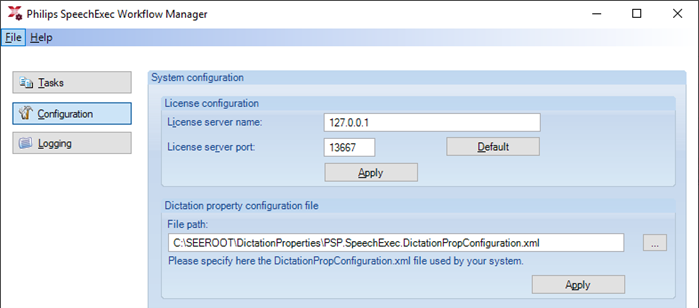
Configuration: This option allows you to configure the application.
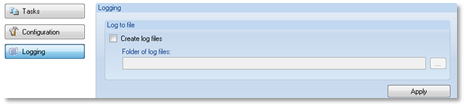
Logging: This option allows you to configure the log settings of the application.
Installation process
Currently, the Enterprise modules are 32 bit applications and therefore run in 32 bit compatibility mode on supported 64 bit operating systems.
Under Windows Server 2012 R2 install the Desktop experience feature to ensure trouble-free usage of SpeechExec. To install Desktop experience, open Server Manager from Administrative Tools and start the Add Features Wizard.In the Add Features Wizard select Desktop Experience and install it. When the installation is complete, then restart the computer.
SpeechExec Enterprise Workflow Manager requires that you have Microsoft .NET 4.6.1 Framework installed. If it is not present on your system, it will be installed automatically during SpeechExec installation.
This chapter describes the installation process of SpeechExec Enterprise Workflow Manager on Windows Server 2019
Important
You need to have administrator rights in order to install the program, otherwise an 'ikernel' error message is displayed at the beginning of the installation process.
Click Install.
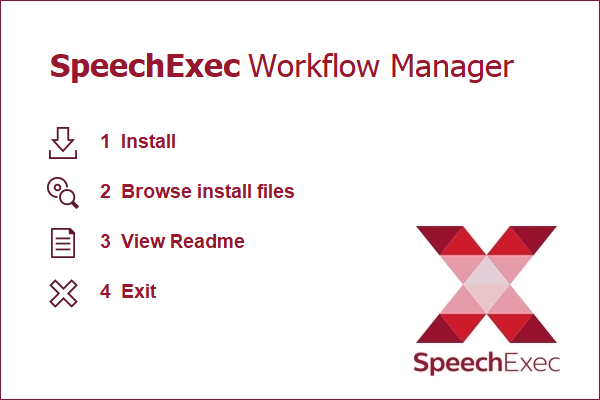
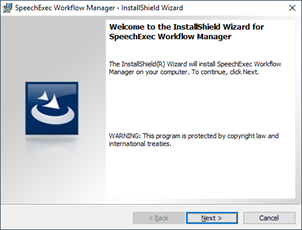
Click Next
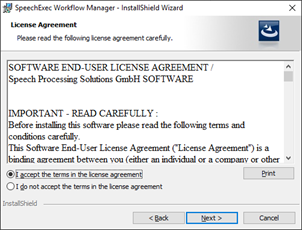
Accept the license terms and click Next
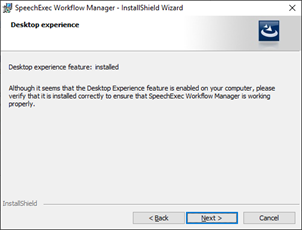
Desktop experiences are installed, click Next
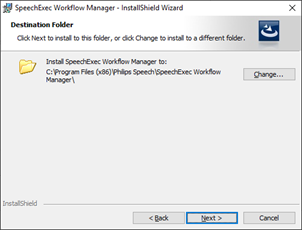
Choose, if needed, the destination folder and click Next.
You can change the standard TCP or HTTP port or click Next
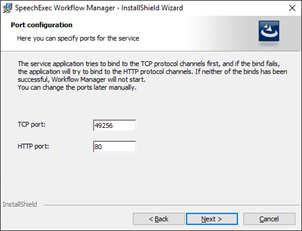
Specify which account should be used and click Next.
Note: Please consider that the account, which runs the workflow manager service has to have access rights to the folders, which should be maintained by the Workflow Manager. If the folder structure is not located on the same server as the Workflow Manager, but somewhere in your network environment it is highly recommended to create a dedicated user account with the appropriate rights.
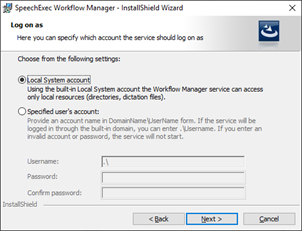
Click Install to begin the installation.
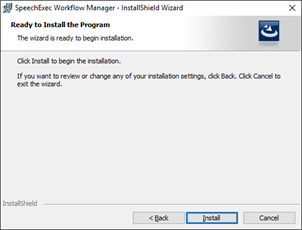
Click Finish to exit the wizard.
Configuration
This is the main window for configuration
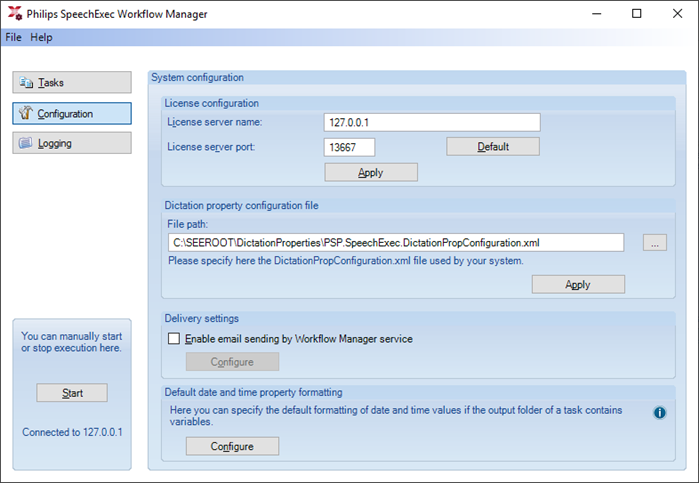
Enter the name of the License Server (IP or Name) and click Apply.
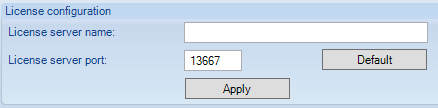
After that select the local path [1] to your dictation property configuration file PSP.SpeechExec.DictationPropConfiguration.xml and click Apply.
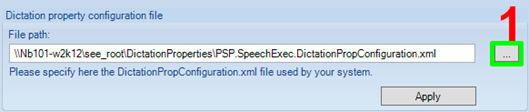
If you are successful you receive the following message – click OK.
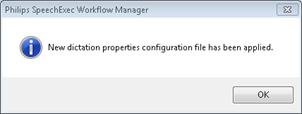
Enable email sending by tasks and configure the SMTP server.
Note: If this option is disabled, the Workflow Manager service will not complete the tasks with email sending action.
For sending email warnings through the Workflow Manager service, only SMTP connection is supported. Establishing the SMTP connection, communication with the SMTP server, and sending email warnings to users is handled by the Workflow Manager server and not the client.
Click Configure
SMTP settings dialog
Server: enter the name of the server. This can also be the IP address.
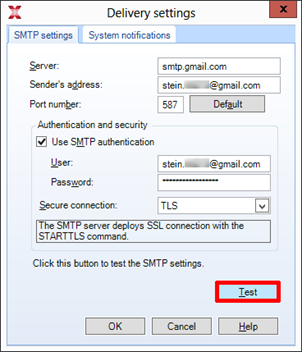
Sender's address: enter your email address. Port number: enter the port number which identifies the SMTP service. Some services or processes have conventionally assigned permanent port numbers. Click the Default button to select this number automatically.
Use SMTP authentication Activate this option if the SMTP server registers legitimate sender addresses for outgoing mail.
Secure connection Select the protocol, through which to create connection to the server. By default this option is set to Off and the SMTP server uses normal TCP/IP connection. To set a different secure connection, select the desired option from the Secure connection combo-box. If the setting is changed to any of the available SSL settings, the SMTP port number changes to the commonly used SSL-enabled SMTP port number 465. For the TLS connection please use port 587.
Test - click this button to verify that the information entered on this page is correct.
System notifications dialog
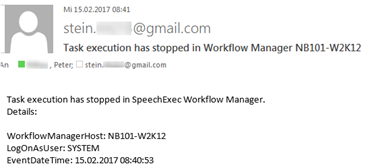
The application will send an email notification to each recipients if license request fails or task execution stops for any reason.
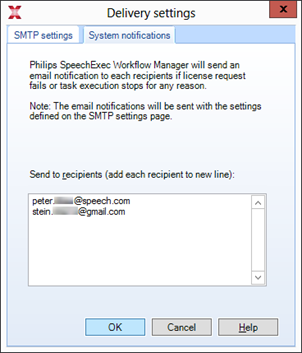
Note: The email notifications will be sent with the settings defined on the SMTP settings dialog.
The Recipient list textbox accepts syntactically valid email addresses, each address in a new line. When clicking OK, the administrator is warned if a syntactically incorrect email address is present in the list.
Note: If this feature is not supported by the Workflow Manager service, this tab is disabled.
This is an example notification created by the SpeechExec Enterprise Workflow Manager.
Default date and time property formatting specify the default date and time format property of the destination folder where the dictation files are copied or moved. The destination folder must be defined when creating or editing a copy or move task. These properties can be added to the path of the destination folder one by one from the Add variable to path list in the Destination folder path editor window where the available variables are listed.

The default date and time format are the short date and short time format retrieved from the server, however, these values can be changed by clicking the Configure button, when the Default date and time formatting dialog is displayed. Default date and time formatting format used for the date of the Date and DateTime type properties The field displays the date format used currently. You can make changes or define a new format manually in the field.
Note
The date format must not be empty.
The following characters can only be used for defining the date properties: y, M, d, space, dot (.), hyphen (-), and underscore (_).
Format used for the time of the DateTime type properties The field displays the time format used currently.
You can make changes or define a new format manually in the field.
Note
The time format cannot be empty.
The following characters can only be used for defining the time properties: H, m, s, space, dot (.), hyphen (-), and underscore (_).
Separator between date and time Separators are punctuation marks that separate the date and time.
The following separators are allowed: No separator, space, hyphen (-) and underscore (_).
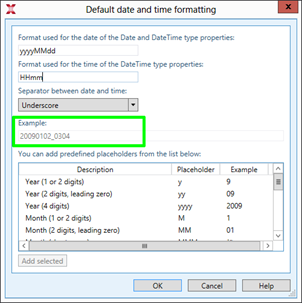
Example: The field displays the value of the date and time formats defined above.
You can also add predefined placeholders from the list by double-clicking or right-clicking one or by selecting a preferred placeholder and clicking the Add selected button below the list.
Click OK to save the defined default formats.
Click Cancel to discard the changes you have made.
Task
In this chapter we will create example tasks. Based on several schedules and rule criteria, dictations and corresponding files are moved, copied, or deleted from the system.
Click on Task [1] or select the +[2] Button
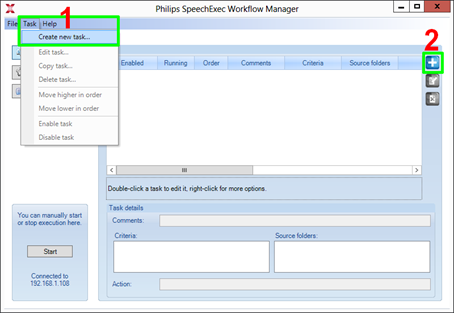
The Task editor window is displayed, which allows the configuration of the schedule, source folders, criteria and action of a task, as well as the enabling/disabling of a task and entering a comment. For the new task, make the following configurations: Edit schedule... option, in the Schedule editor window you can specify the time when the task should run.
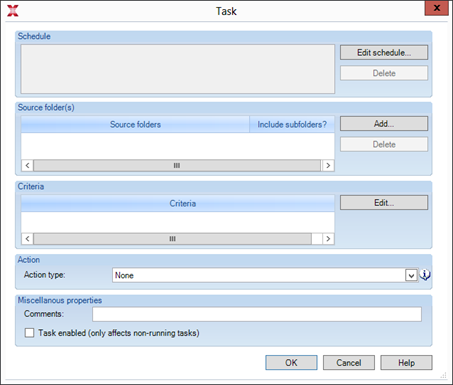
The source folders are the directories, the dictations of which are routed by the tasks. In the Criteria editor window you can specify the conditions of the tasks for the dictations. The dictations that meet the criteria set here are processed while the task is running. In the Action you can specify the action of processing the dictations. Miscellanous properties - you can add a comment to the task.
Schedule
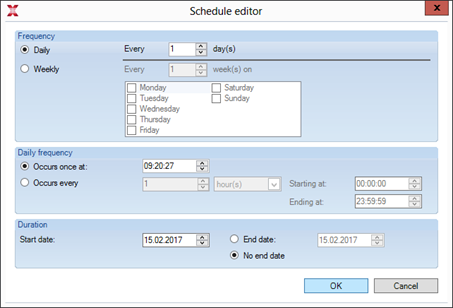
With the Edit schedule… option, in the Schedule editor window you can specify the time when the task should run.

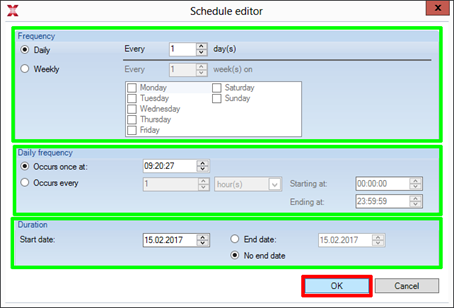
Frequency
specify the frequency of running the tasks by choosing one of the following options:
Daily - the task runs daily or every “x” days.
Weekly - the task runs weekly or every “x” weeks on the given days.
Daily frequency - specify the exact time when the task should start running. Occurs once at - the task starts running at the exact time that you set (for example, 09:08:42). Occurs every - the task runs every “x” hours or minutes that you set from the starting time until the ending time (for example, every 1 hours, starting from 00:00:00 until 23:59:59).
Note
Tasks, whose daily frequency is set to a specific time (Occurs once at: option) can be executed later, even if it is delayed to another day, which is not enabled for the specified task.
Tasks, whose daily frequency is set to a time range (Occurs every option) can only be executed if the current time is between the starting and ending time.
Duration
Specify the start date from which the settings should be applied. The end date can be chosen as follows:
End date - Specify a date when the settings expire.
No end date - the validity of the settings will not expire.
Source folder
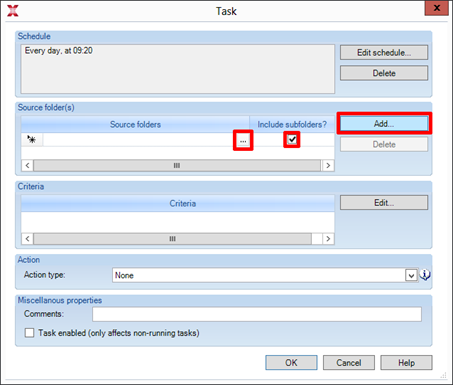
The source folders are the directories, the dictations of which are routed by the tasks.
Add - you can add a new folder with this option either by typing the full path of the folder or by browsing for the folder with the Add button.
To enable processing dictations in the subfolders, check in the Include subfolders option.
Delete - you can delete the selected folders from the source folders list.

Criteria
With the Edit… option, in the Criteria editor window you can specify the conditions of the tasks for the dictations. The dictations that meet the criteria set here are processed while the task is running.
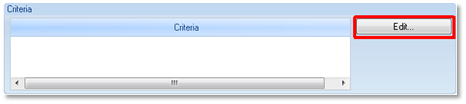
To define custom criteria click on New.
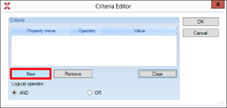
Select the Property name column and the Operator comparison algorithm, and type the specific information you are looking for into the Value column.
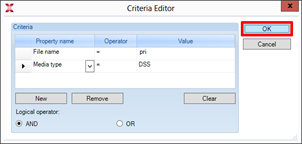
Example
Property name - select: File name
Operator - select: =
Value - type: pri
To create more conditions in this criteria, repeat this step. You can use also logical operator AND, OR.
Property name | Operator |
|---|---|
File name Media type Has special instruction Dictation length (seconds) Instruction length Dictation length Created Last modified State Last user Encrypted Notification Attach file to notification Email address for notification Author Revision author Title Keyword Comment Priority EOL (DPM) Label1 (DPM) Label2 (DPM) Barcode Download date (DPM) Work type Typist Dictation identifier Department Workstation Custom1 Custom2 Custom3 Custom4 Custom5 Document name Speech recognizable dictation Queued for speechrecognition Queued for speech recognition by Recorded with Vocabulary extension performed Readonly simple edit strings | = <> Contains Not Contains Starts with Not Starts with |
Action
Here you can specify the action of processing the dictations
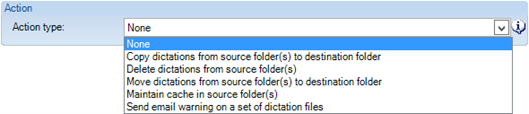
You can select following options:
None
Copy dictations from source folder(s) to destination folder – this action needs a destination folder specified in the Destination folder field. To keep the directory hierarchy of the folders and subfolders also in the destination folder, check in the Maintain directory hierarchy during copy/move option.
Delete dictations from source folder(s) – this action does not need any additional specification. Deleting a dictation´s files is permanent, Recycle Bin is not used.
Move dictations from source folder(s) to destination folder – this action needs a destination folder specified in the Destination folder field. To keep the directory hierarchy of the folders and subfolders also in the destination folder, check in the Maintain directory hierarchy during copy/move option.
Maintain cache in source folder(s) – this action creates or maintains a cache file that contains information about the dictations in the source folder. The cache file helps other SpeechExec applications (for example, Enterprise Dictate and Enterprise Transcribe) to process the directory faster. No criteria are needed for this action.
Send email warning on a set of dictation files – this action sends email warnings to users based on the defined criteria. This action requires the email settings and SMTP server to be configured.
Miscellaneous properties
You can add a comment to the task.

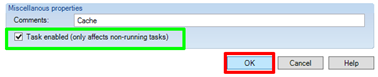
Task enabled (only affects non-running tasks) You can enable the selected task by checking in this option. If a task is already running, disabling it will take into effect only after it stops.
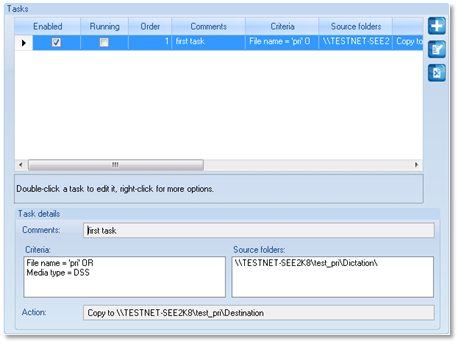
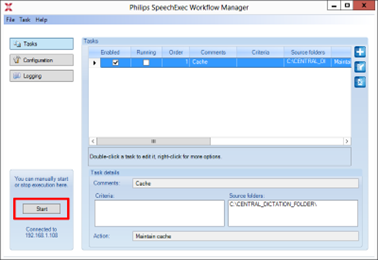
Now you can see all the tasks and tasks details
Setup examples
In this chapter we will create some example tasks. Based on several schedules and rule criteria, dictations and corresponding files are moved, copied, or deleted from the system.
Maintain Cache
One of the features of the Workflow Manager is that it can create a centralized cache of dictation files. Each sub folder will contain a separate cache file of the dictations found in that folder. Networking caching can make the client applications open faster when launched. It is sufficient enough to perform the Network caching task once a day and usually at a time when the system will be idle. We have designed our system to have all the client accessible dictation files within the CENTRAL_DICTATION workflow folder. We will cache beginning from that folder and traverse through all the subfolders.
Click the + button to start the task wizard.
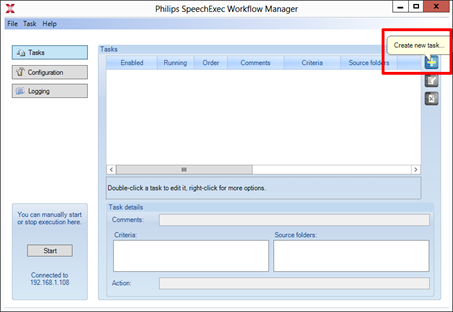
Click the Edit schedule… button.
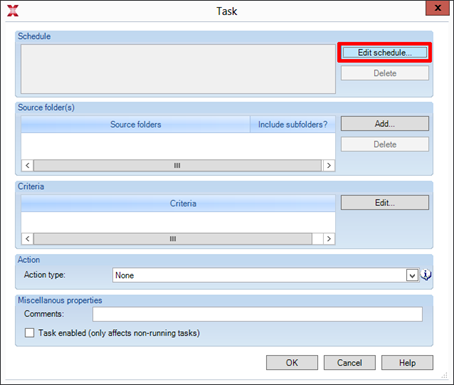
Choose the settings as shown below and click OK.
Click Add…, checkmark the box in the Include subfolders? Column and click the browse button … to set the source folders.
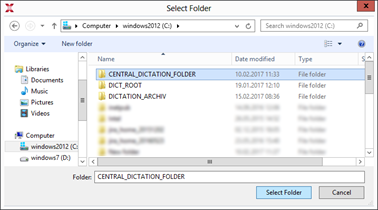
Browse to the CENTRAL_DICTATION folder and click Select Folder
Now select Action type: Maintain cache in source folder(s), set a comment for the task.
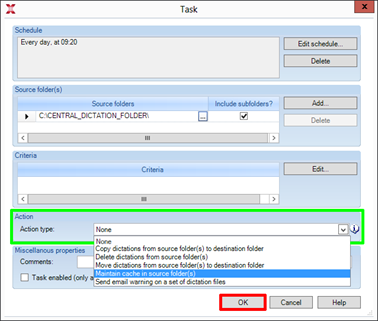
check Task enabled (only affects non-running tasks) and click OK.
The new task has been created. Run the task(s) by clicking the Start button.
Logging
Here you can specify the place of the log files.
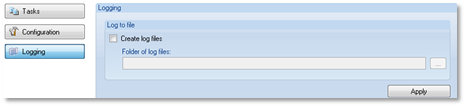
You can enable logging to files by checking Create log files option. If this option is active, you have to specify a folder [1] (in UNC path format) where the log files are generated.
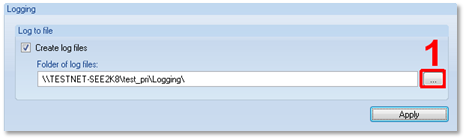
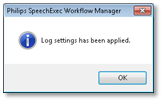
Save the settings with the Apply button.