SpeechLive Service
Installation
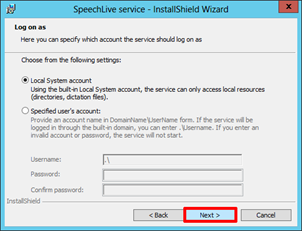
During the setup, you are required to provide a user to properly setup the IIS and Windows service component of SpeechLive service. The SpeechLive service also requires access to a Microsoft SQL Database.
This user must have access to the following resources: - Your Installed SQL server to create / modify the settings database - Your ‘SEERoot’ folder used for configuration later The given user will be configured as a “run as” user for both the IIS web service AppPool, and the Windows service (the user must have read and write permissions for the SEERoot configuration and finished dictation folders). Further configuration on the installed IIS web service and the Windows service must be done manually using the guide below.
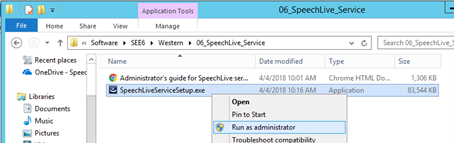
We recommend using the same user account for the AppPool and the Service even if you change it after the installation. To start the installation - Right-click SpeechLiveServiceSetup.exe and select "Run as administrator" to get elevated permissions.
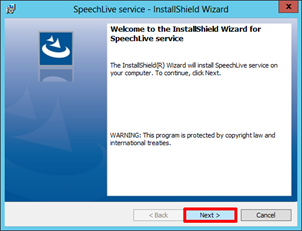
Click on Next
Select account for installation and click on Next
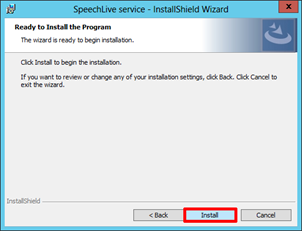
Start installation process with click on Install
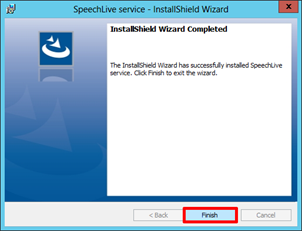
Click on Finish and close the installation process.
Configuration
Autostart webservice on IIS version 7.X
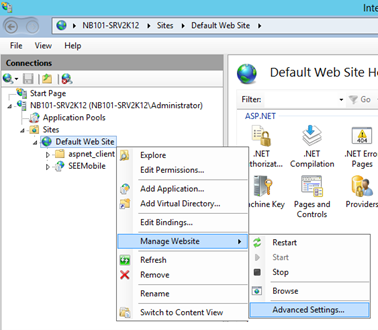
Right click on Default Web Site, select Manage Website and click on Advanced Settings
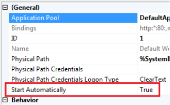
Set Start Automatically to True
Autostart webservice on IIS version 8 or later
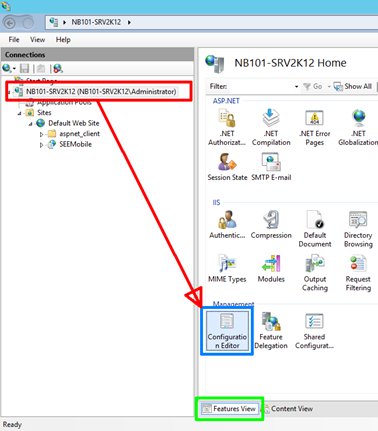
In IIS Manager click on computer name on the Connection pane, switch to Features View if the view is not active. Double click on Configuration Editor in the Management section of the Features View.
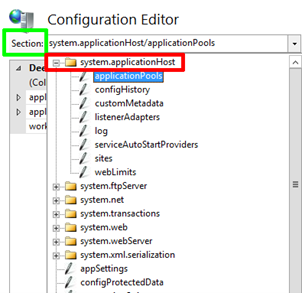
Click the down arrow in the Section field, expand system.applicationHost and click on applicationPools
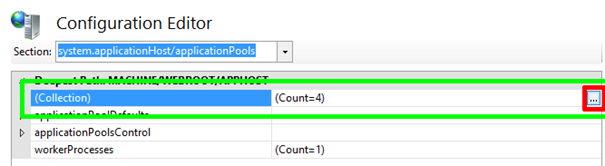
Click on Collection and then click the … Button to the right of the count
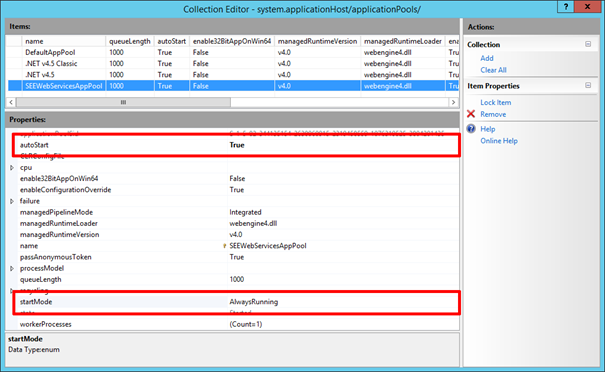
In the Collection Editor select SEEWebServicesAppPool item and in the Properties window set the following attributes:
autoStart attribute to True
startMode attribute to AlwaysRunning
Close the Collection Editor with the X
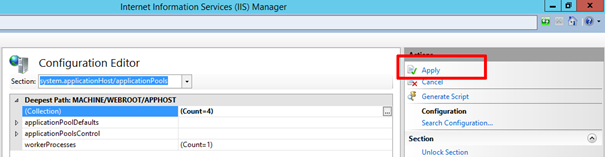
Click Apply to save your changes
Change user identity for the application pool
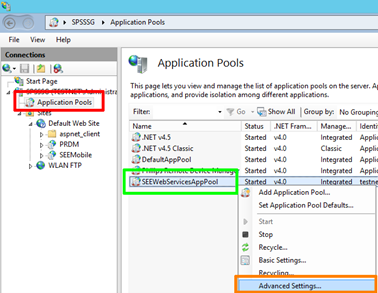
To change the user identity of the application pool newly created by the application setup, follow the short instruction. On the Application Pools panel in IIS, right click SEEWebServiceAppPool and select Advanced Settings…
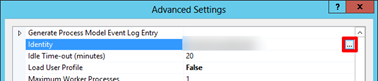
In the Advanced Settings dialog select Identity and click on … button
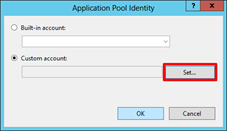
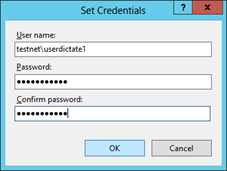
In the Application Pool Identity dialog check Custom account and click on Set. In the Set Credential dialog enter your user identity credentials and click on OK
IMPORTANT NOTE: The user has to have read and write permision for the SEEROOT configuration, finished dictation and archive folder
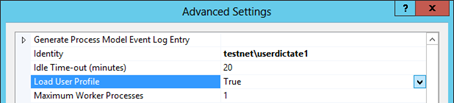
Make sure that the Load User Profile setting is set to True.
Activate Windows Authentication for the service
To enable Windows Authentication, do the following steps. In the Connections panel on the left, select the Sites and click on SpeechLiveService, double click on Authentication in the IIS section of the Features View panel.