Upgrading SpeechExec Enterprise
Warning
This upgrade must take place at a time when Enterprise Users are NOT running Dictate or Transcribe!
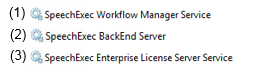
STOP these specific Windows services if they are installed in the order given before proceeding:
You can upgrade SpeechExec Enterprise from following versions to 9.0:
SpeechExec Enterprise 8.x
SpeechExec Enterprise 7.x
Update process
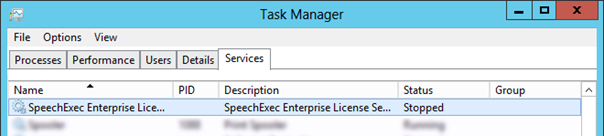
Before you start with the update process, make sure that the SpeechExec Enterprise License Server Service is stopped.
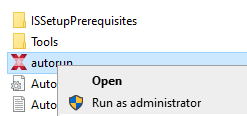
To start the Update process open the folder Western\01_Foundation\02_Enterprise_License_Server
Select the executable Autorun file to start the installation as administrator
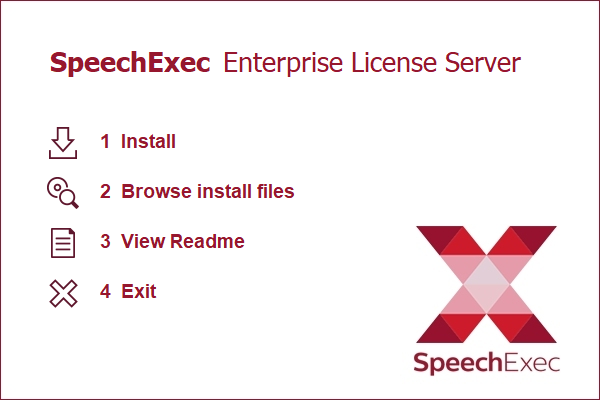
Click on Install.
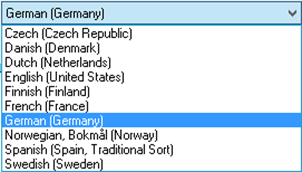
Select the Installation Language and click on OK. The available languages are: Czech, Danisch, Dutch, English, Finnish, French, German, Norwegian, Spanish and Swedish.

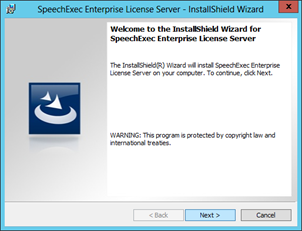
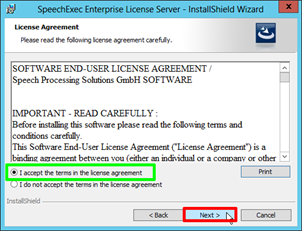
Click Next and Accept the terms in the license agreement and click again on Next.
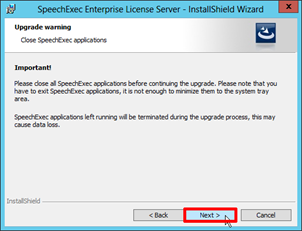
This warning message is related to the running System/Services, because we have already stopped this service manually before, now just click on Next and once more Click Next
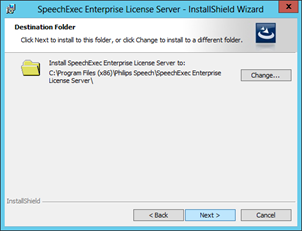
Click Install to begin the installation.
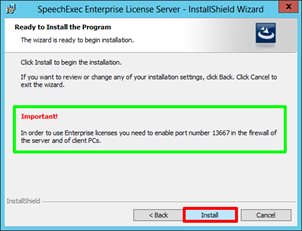
Activate Automatically close … and click on OK
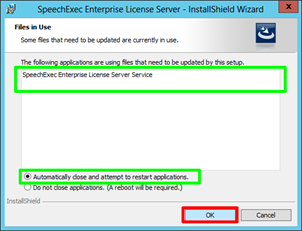
Process is running.

Click on Finish and close the update process.
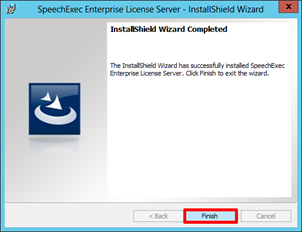
Update Manager
To start the Upgrade process open the folder Western\01_Foundation\03_Enterprise_Manager
Select the executable Autorun file to start the installation as administrator
Click on Install.
Select the installation language.
Accept the license agreement and click [Next]
Upgrade warning: Read and click [Next]
Destination Folder: Keep the suggested location and click [Next]
Custom setup: if you want to use statistics for dictation and transcription modules later, you can activate the option – Dictation Statistics, but if you don't need this, you can click on the icon and select "This feature will not be available". Click [Next]
Specify the root folder of configuration files. This will be filled-in by the registry. Click [Next]
If you also want to configure the hardware remotely, you can also install the Remote device management software at the same time. Please note that you may need an additional license, OR you do not select to install Remote device management software. Click [Next]
Ready to install: click [Install]
Upgrade process
Warning
During upgrading SpeechExec, all SpeechExec processes will be shut down. If you have any unsaved data, make sure you first save them, and then start upgrading. Otherwise, your unsaved data may be lost.
Before upgrading SpeechExec it is recommended to backup your configuration files. For installations with a central configuration these are located on a central server. For local installations (CONFIGFILELOCATIONTYPE=Local) these configuration files can be found in:
PSP.SpeechExec.SystemDefaultSettings.xml, which you find in the installation directory of SpeechExec,
PSP.SpeechExec.DictationPropConfiguration.xml, which you find in the installation directory of SpeechExec,
User configuration files, depending on your operating system they are located in:
USERS_DIR\USERNAME\AppData\Roaming\Philips Speech\SpeechExec
for example C:\Users\peter\AppData\Roaming\Philips Speech\SpeechExec\peter.xml

To start the Upgrade process open the folder Western\01_Foundation\05_Enterprise_Transcribe
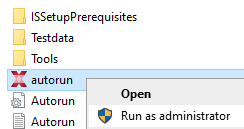
Select the executable Autorun file to start the installation as administrator
Click on Install.
Select the installation language.
Accept the license agreement and click [Next]
Upgrade warning: Read and click [Next]
Custom setup: Click [Next]
Specify the central root folder of configuration files. This will be filled-in by the registry. Click [Next]
Ready to install: click [Install]
Update process
Warning
During upgrading SpeechExec, all SpeechExec processes will be shut down. If you have any unsaved data, make sure you first save them, and then start upgrading. Otherwise, your unsaved data may be lost.
Before upgrading SpeechExec it is recommended to backup your configuration files. For installations with a central configuration these are located on a central server. For local installations (CONFIGFILELOCATIONTYPE=Local) these configuration files can be found in:
C:\Program Files(x86)\Philips Speech\SpeechExec Enterprise Transcribe\
PSP.SpeechExec.SystemDefaultSettings.xml, PSP.SpeechExec.DictationPropConfiguration.xml.
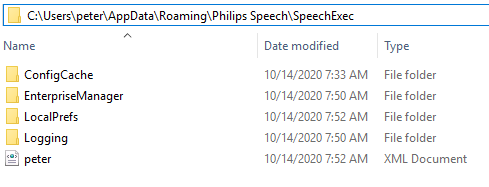
The user configuration files, depending on your operating system, are located in:
USERS_DIR\USERNAME\AppData\Roaming\PhilipsSpeech\SpeechExec\
for example C:\Users\peter\AppData\Roaming\Philips Speech\SpeechExec\peter.xml
To start the Upgrade process open the folder Western\01_Foundation\05_Enterprise_Transcribe
Select the executable Autorun file to start the installation as administrator
Click on Install.
Select the installation language.
Accept the license agreement and click [Next]
Upgrade warning: Read and click [Next]
Custom setup: Click [Next]
Specify the central root folder of configuration files. This will be filled-in by the registry. Click [Next]
Ready to install: click [Install]
Upgrade Workflow Manager
To start the Upgrade process open the folder Western\03_Workflow\02_Installation
Select the executable Autorun file to start the installation as administrator
Click on Install.
Select the installation language.
Accept the license agreement and click [Next]
Upgrade warning: Read and click [Next]
Destination Folder: Keep the suggested location and click [Next]
Port configuration: Verify that these values are the same as you recorded earlier. If they are not, make the change now! Click [Next]
Log on as: verify that these settings are the same as you recorded earlier. Click [Next]
Ready to install: click [Install]
Completed! Click [Finish]
Verify the service has started…if not click Refresh

Upgrade Statistics - Backend Server
To start the Upgrade process open the folder Western\02_Statistics\03_BackEndServer
Select the executable Autorun file to start the installation as administrator
Click on Install.
Select the installation language.
Accept the license agreement and click [Next]
Upgrade warning: Read and click [Next]
Destination Folder: Keep the suggested location and click [Next]
Ready to install: click [Install]
Files in use: If you receive this dialog, click [OK]
Completed! Click [Finish]
Database Tool
Choose [Upgrade existing database] and click [Next]
SQL server settings: Should already be pre-filled. Click [Next]
You should receive an “Operation failed” message…as…”The database is up-to-date!”.
Click [Finish]