Mobile Service
This service allows you to send dictations from a Philips Voice Recorder App directly to your SpeechExec Enterprise system. That means you can use your own private cloud to send dictations to - and access them from SpeechExec clients.
Installation
Right-click MobileServiceSetup.exe and select "Run as administrator" to get elevated permissions.
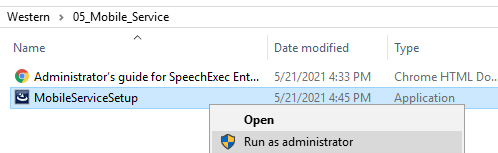
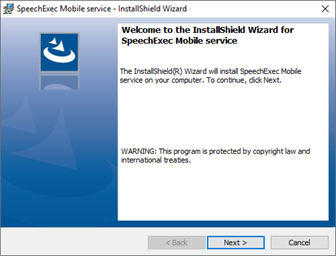
Click on Next
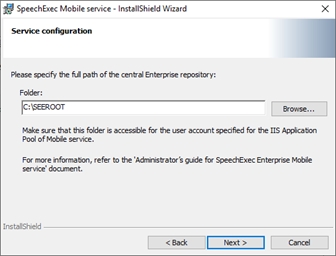
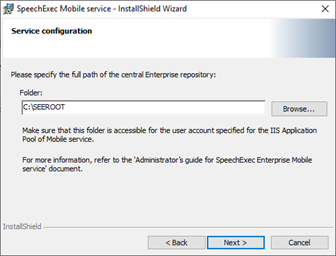
Click on Browse and select the path to the SEE cental configuration folder e.g C:\SEEROOT or select the Network folder if the installation is located outside the IIS Server.
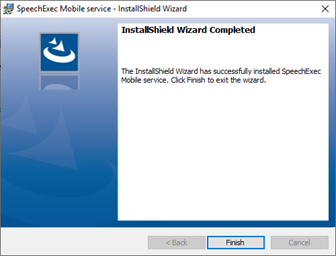
Click on Finish to close the installation wizard.
Configuration
To setup the SEEMobile service you need launch the IIS Manager and start the advanced settings.
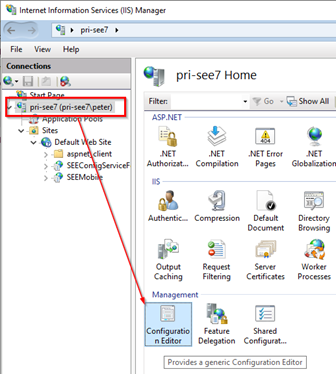
In IIS Manager click on computer name on the Connection pane, switch to Features View if the view is not active. Double click on Configuration Editor in the Management section of the Features View.
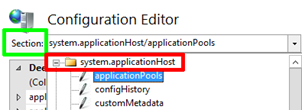
Click the down arrow in the Section field, expand system.applicationHost and click on applicationPools
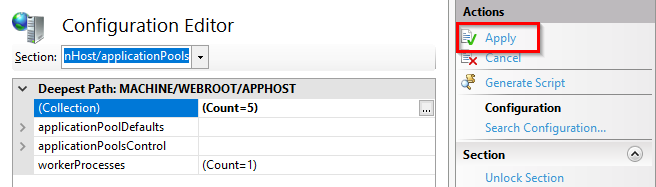
Click on Collection and then click the … Button to the right of the count

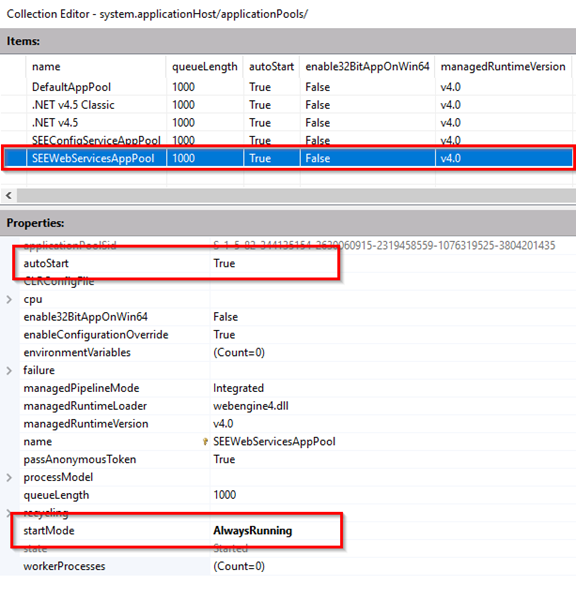
In the Collection Editor select SEEWebServicesAppPool item and in the Properties window set the following attributes: autoStart attribute to True startMode attribute to AlwaysRunning
Close the Collection Editor with x
Click Apply to save your changes
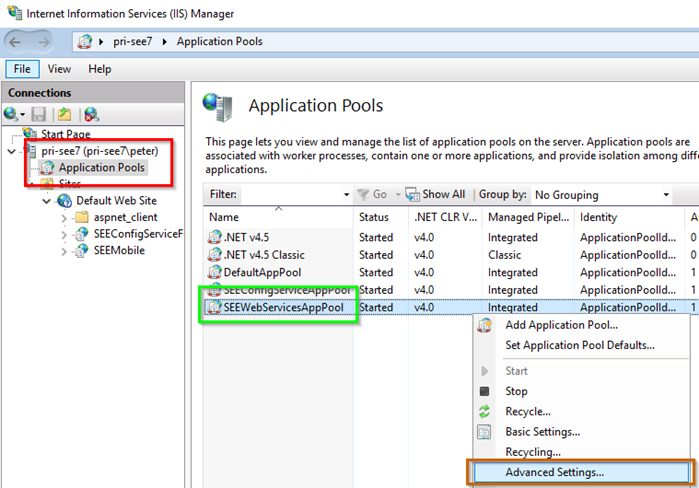
To change the user identity of the application pool newly created by the application setup, follow the short instruction. On the Application Pools panel in IIS, right click SEEWebServiceAppPool and select Advanced Settings…
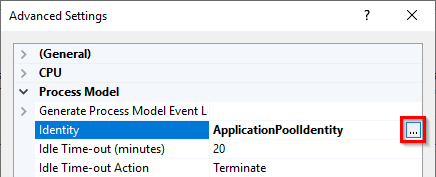
In the Advanced Settings dialog select Identity and click on … button
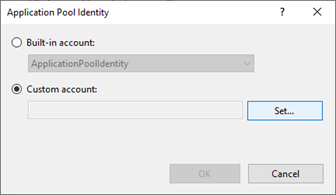
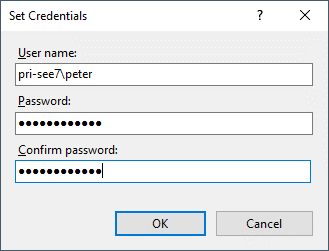
In the Application Pool Identity dialog check Custom account and click on Set. In the Set Credential dialog enter your user identity credentials and click on OK
IMPORTANT NOTE: The user has to have read and write permision for the SEEROOT configuration, finished dictation and archive folder
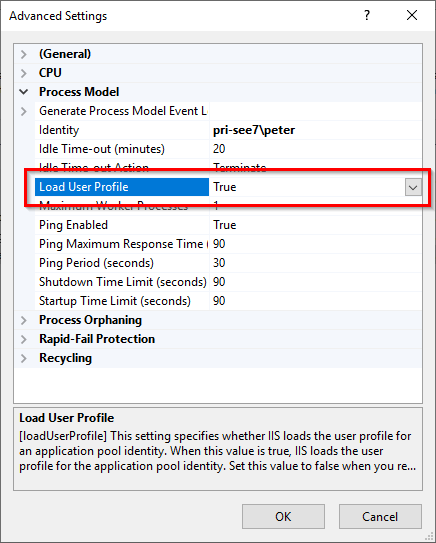
Make sure that the Load User Profile setting is set to True.
Activate Windows Authentication for the service
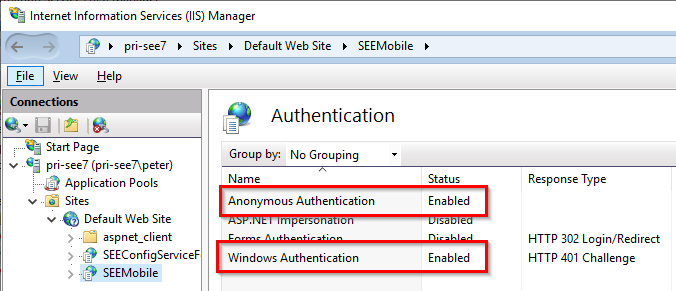
To enable Windows Authentication, do the following steps. In the Connections panel on the left, select the Sites and click on SEEMobile, double click on Authentication in the IIS section of the Features View panel.

In the Authentication panel right click on Anonymous Authentication and select Enabled right click on Windows Authentication and select Enabled
Change SEEROOT in the web.config
During installation, the SEEROOT central configuration folder must be selected and cannot be modified by the installer later, only manual modification is supported.
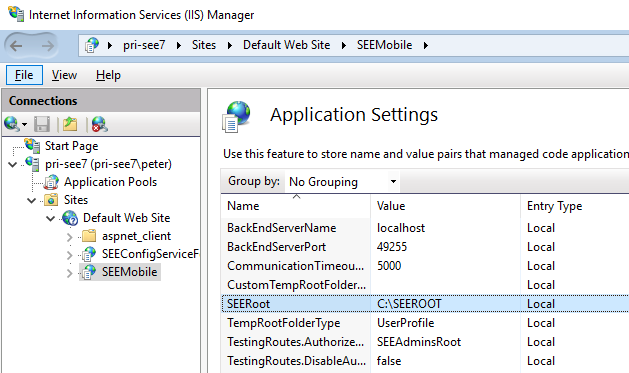
If you want to change the path of the SEEROOT configuration folder after the installation, open the IIS Manager, select the SEEMobile node and double click Application Settings
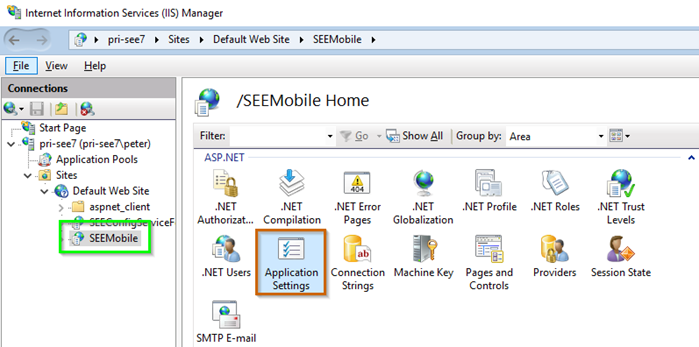
Double click SEERoot to change the path of the SEEROOT configuration folder:
Testing
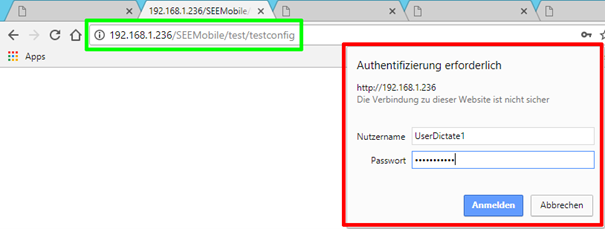
Mobile service provides a dedicated testing interface available via URL: http://SERVER/SEEMobile/test/testconfig For example, if the server is running on the local computer, the URL looks like the following: http://localhost/SEEMobile/test/testconfig
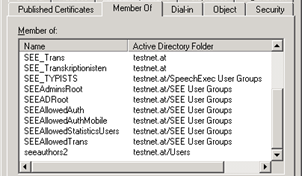
To limit user access to the URL, opening this URL by default requires the following: An authenticated Active Directory user session on the calling browser side The calling user must be member of the SEEAllowedAuthMobile SEEAllowedAuth SEEAdminsRoot Active Directory security group.
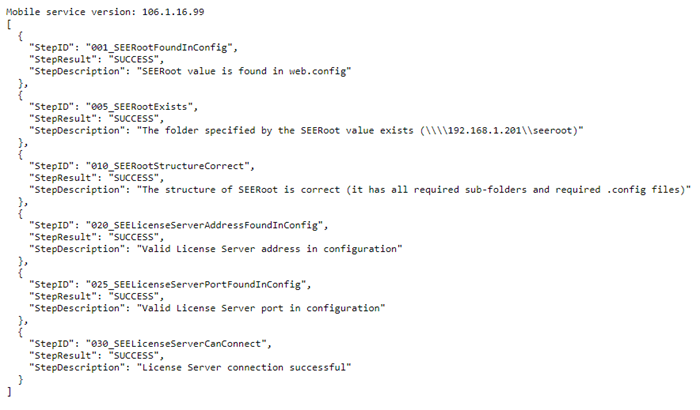
The test process validates the servers configuration settings and returns a JSON array of validation steps. Each validation step consists of a StepID, a StepResult and a StepExplanation. Returned response codes can be the following: 401 (Unauthorized), if the current user cannot be authenticated by the web service 566, if any of the validation steps failed
Please make sure that Mobile service is Enabled and has a compatible License Server configured in Enterprise Manager before attempting a test! To turn on Mobile Service: Open Enterprise Manager/System Administration/Groups and users/Mobile service settings and enable use Mobile Service.
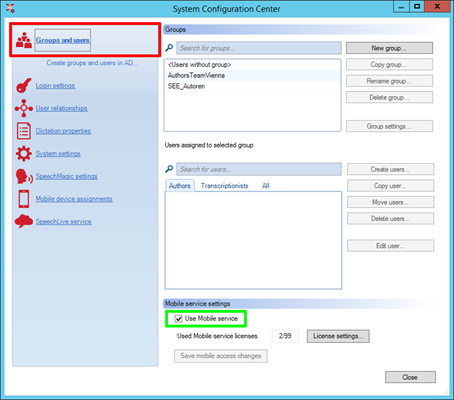
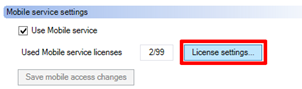
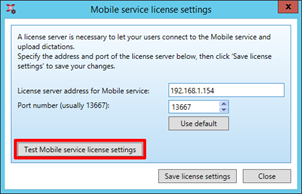
Add a supported License Server with a compatible license loaded in the License settings…window (accessible from the same panel). Click on Test Mobile service license settings to check the available account for Mobile devices
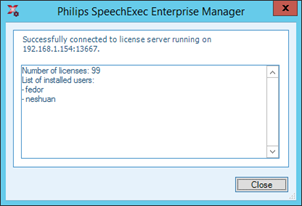
In our example we have two activated users: fedor and neshuan
now, you can test the connection with Philips Dictation recorder
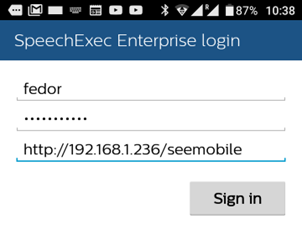
If the above conditions are not met, the test will fail at “020_SEELicenseServerAddressFoundInConfig”. Validation steps:
StepID Description
001_SEERootFoundInConfig SEERoot value must be found in web.config 005_SEERootExists The folder specified by the SEERoot value exists 010_SEERootStructureCorrect The service must be able to read from and write to SEERoot folder 020_SEELicenseServerAddressFoundInConfig License server address found in SEERoot config 025_SEELicenseServerPortFoundInConfig License server port found in SEERoot config 030_SEELicenseServerCanConnect Can connect to License server with the given address and port in the SEERoot configuration
Example response result when the 1st step passed, but the 2nd step failed:
{ "StepID": "001_SEERootFoundInConfig", "StepResult": "SUCCESS", "StepDescription": "SEERoot value is found in web.config" }, { "StepID": "005_SEERootExists", "StepResult": "FAIL", "StepDescription": "The folder specified by the SEERoot value.does not exist" },
Example response result when all steps are passed:
Mobile service version: 106.0.3.25 [ { "StepID": "001_SEERootFoundInConfig", "StepResult": "SUCCESS", "StepDescription": "SEERoot value is found in web.config" }, { "StepID": "005_SEERootExists", "StepResult": "SUCCESS", "StepDescription": "The folder specified by the SEERoot value exists (\\\\192.168.1.201\\seeroot)" }, { "StepID": "010_SEERootStructureCorrect", "StepResult": "SUCCESS", "StepDescription": "The structure of SEERoot is correct (it has all required sub-folders and required .config files)" }, { "StepID": "020_SEELicenseServerAddressFoundInConfig", "StepResult": "SUCCESS", "StepDescription": "Valid License Server address in configuration" }, { "StepID": "025_SEELicenseServerPortFoundInConfig", "StepResult": "SUCCESS", "StepDescription": "Valid License Server port in configuration" }, { "StepID": "030_SEELicenseServerCanConnect", "StepResult": "SUCCESS", "StepDescription": "License Server connection successful" } ]
Setup application pool of the web service
In the Connections panel on the left, select the Sites/SEEMobile web service. Right click on it, click on Manage Application and select Advanced Settings
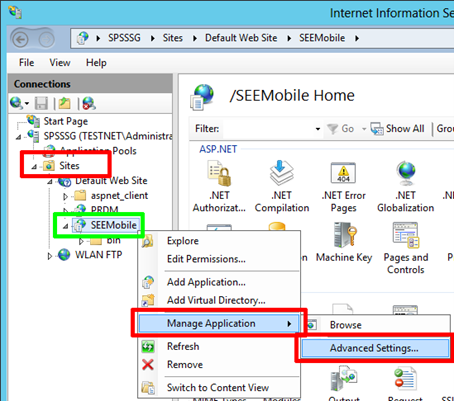
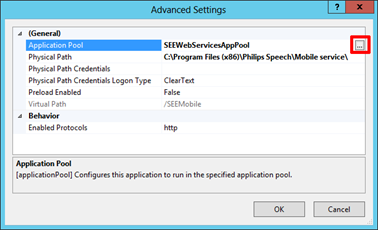
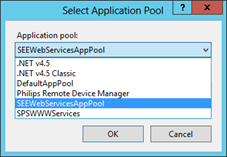
In the Advanced Settings dialog, select Application Pool and click on Browse (…). In the Select Application Pool dialog, select SEEWebServicesAppPool, and click OK. Or select other Application Pool
Create new application pool
Application pools allow isolating one web application from another, even if they are running on the same server. This way, if there is an error in one app, it will not take down other applications. Additionally, applications pools allow specifying different levels of security (for example, file access security) for different apps. The installer of the web service will by default create a new application pool and assign the web service to the pool.
If a new application pool need be created, follow the instructions below:
1. Open the Internet Information Services (IIS) Manager.
2. Select Application Pools from the Connections panel on the left. Right-click on the Application Pools panel and select Add Application Pool…
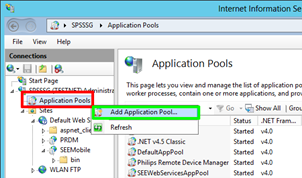
3. Enter a name for your new application pool, such as SPSWWWServices.
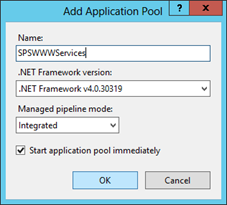
4. In the .NET CLR version list, select .NET CLR Version v4.0.30319 5. Make sure the Start application pool immediately checkbox is selected. 6. Click OK to create and start the application pool.
Logging
The name of the log configuration file is SpeechExecLog.config. It is located in the It is the IIS administrator’s responsibility to manually edit the SpeechExecLog.config file and specify correct configuration values.
The default path of the log file is: <param name=”File” value=”c:/SEEMobileServiceLogFolder/SEEMobileService.log” />
The default maximum size of the log file is: <param name="MaximumFileSize" value="1000MB" />