Use your SpeechMike
Note
Any operations, e.g. recording or configuring your SpeechMike with SpeechControl driver and configuration software, have to be executed with the docking station connected to your computer. Do not connect the SpeechMike directly to the computer via a USB cable for this purpose. Connecting the SpeechMike directly to the computer is only intended for charging the device.
Create a recording
Recording and playback of dictations with the SpeechMike requires dictation software such as Philips SpeechExec to be installed on the computer.
For more information on recording with the SpeechMike and the Philips SpeechExec software, download the SpeechExec user manual at www.philips.com/dictation.
Note
For best results, speak clearly and keep the microphone about 10 to 15 cm (4 to 6 inches) away from your mouth.
Make sure that the distance between the SpeechMike and the docking station is not more than 5 meters (16 feet). For more information, see Learn about wireless technology.
Make sure the docking station is connected to your computer, otherwise recording is not possible.
Customize the SpeechMike
Use the Device Control Center software to customize the SpeechMike to suit individual user needs.
The software allows to assign different functions to each key, enable or disable certain features and also to start and control applications with the SpeechMike.
Customize SpeechMike keys and settings
Make sure that the docking station is connected to the computer via the supplied USB cable and that the wireless connection to the SpeechMike is established.
Download and install the latest version of SpeechControl (Philips Device Control Center) from https://www.dictation.philips.com/speechcontrol.
Start Philips Device Control Center:
If the option to start the Philips Device Control Center automatically was selected during installation, open the program by clicking the
 icon in the notification area of the Windows task bar.
To manually start the program, open the Windows start menu in Windows and select Philips Speech Control > Philips Device Control Center.
The current settings are automatically downloaded from the connected SpeechMike.
On the Device tab, configure device settings and select the function to be assigned to each key.
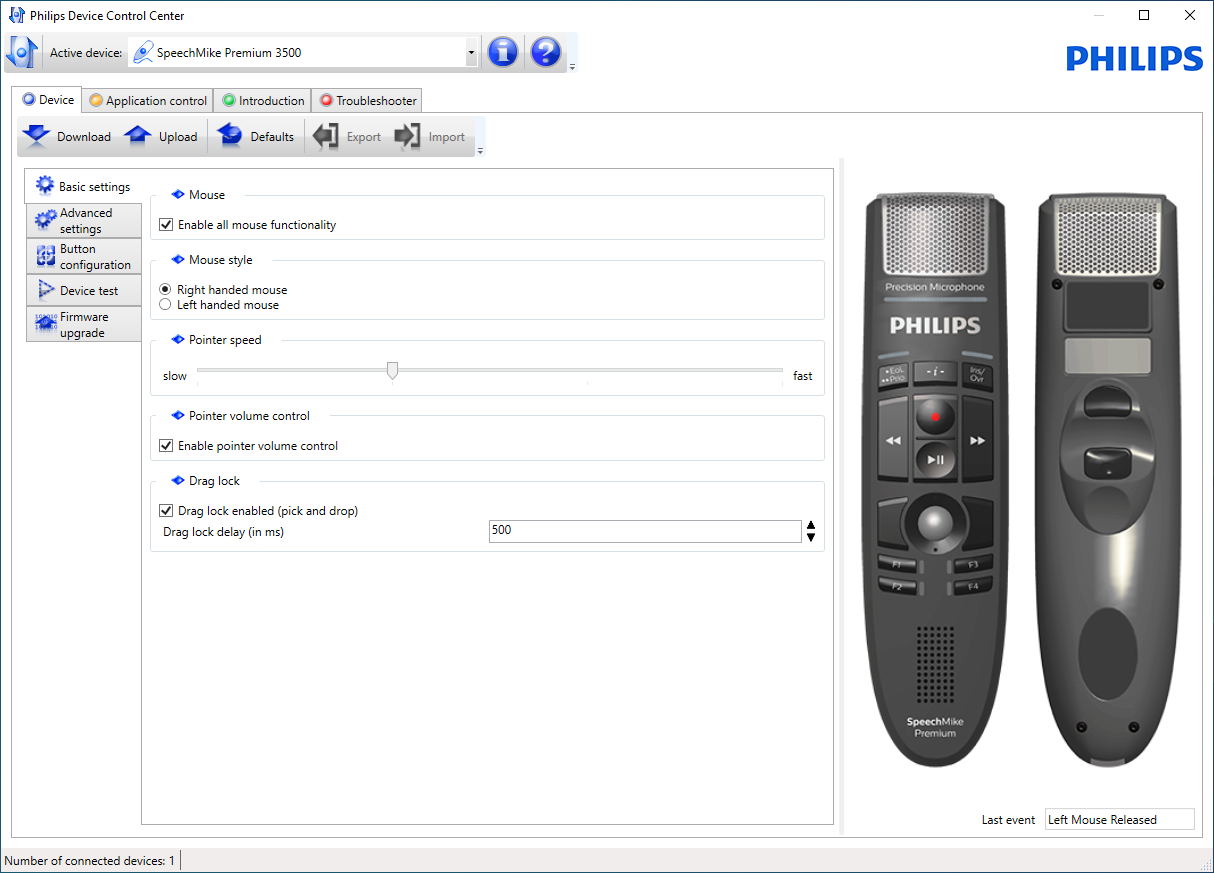
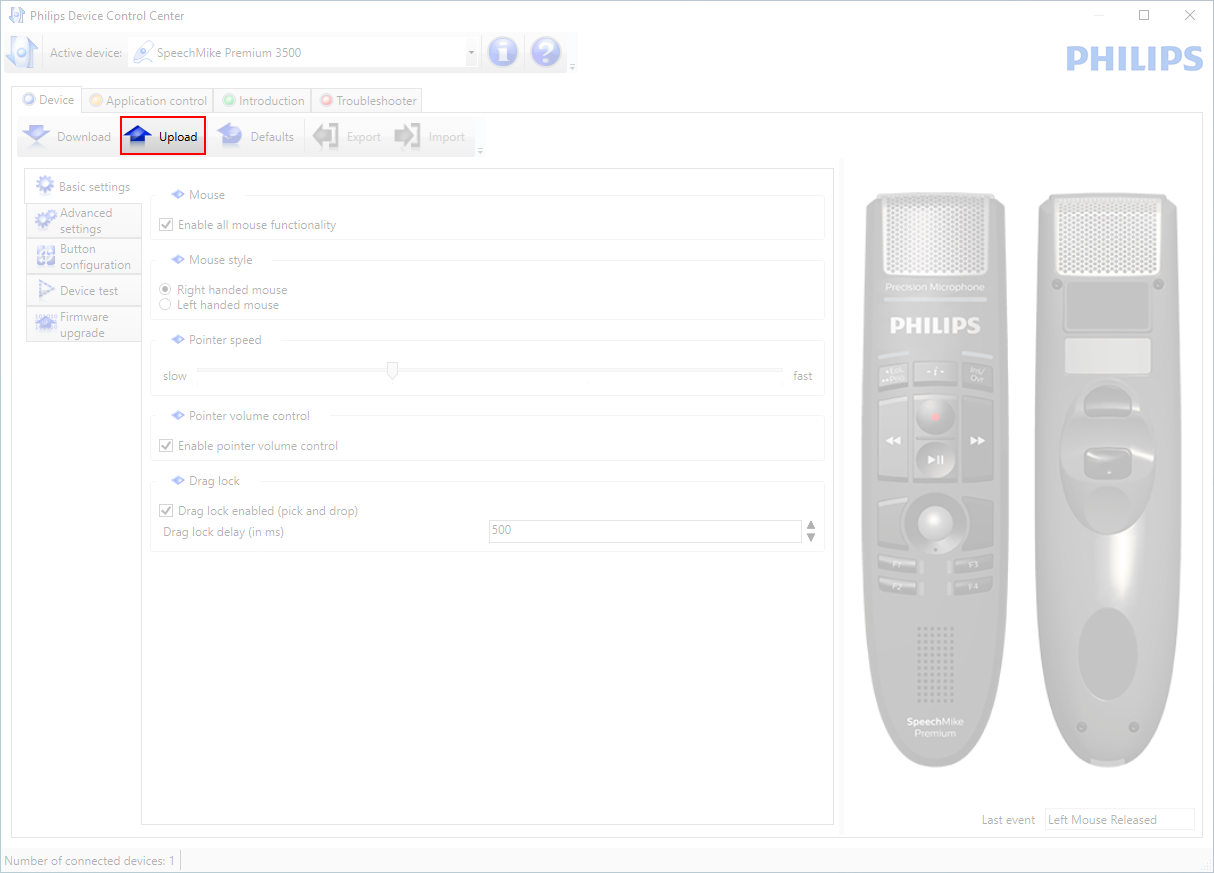
Click the Upload button to save the new settings.
Note
Settings can't be changed when the battery LED glows red. Charge the SpeechMike before changing the settings.
The SpeechMike can be reset to its factory default configuration by clicking the Defaults button. Click the Upload button to save the default settings.
Tip
To test settings and key functions, use the Device test section on the Device tab.
Use application shortcuts
The Device Control Center software allows to start and control other applications with the keys on the SpeechMike.
The Device Control Center software includes pre-installed profiles that make the SpeechMike ready for immediate operation with Dragon NaturallySpeaking speech recognition software and Microsoft Powerpoint. Additional profiles for other applications can be programmed.
Download and install the latest version of SpeechControl (Philips Device Control Center) from https://www.dictation.philips.com/speechcontrol.
If the option to start the Device Control Center automatically was selected during installation, the application
icon appears in the notification area of the Windows task bar.To manually start the program, open the Windows start menu in Windows and select Philips Speech Control > Philips Device Control Center.
Right-click on the application
icon in the notification area of the Windows task bar and verify that Activate application control is enabled. If the option is disabled, the configured settings and buttons will not function for any of the target applications.
Note
Exit Philips SpeechExec software when using application shortcuts to prevent unintentional recording when controlling other applications.
Default profile
The default profile is applied automatically when there is no profile assigned to an application in focus. This profile is set up to control Dragon NaturallySpeaking with your SpeechMike. The following settings are defined:
SpeechMike key | Assigned shortcut |
|---|---|
g Record | Record (push to dictate) |
e Play/Stop | Play from cursor position |
V Rewind | Move cursor backwards |
W Fast forward | Move cursor forwards |
• EOL/•• PRIO | Mark backwards |
INS/OVR | Open correction window |
Powerpoint profile
Use this profile to control Powerpoint presentations with the SpeechMike. The following settings are defined:
SpeechMike key | Assigned shortcut |
|---|---|
g Record | Black screen |
e Play/Stop | White Screen |
V Rewind | Go to previous slide |
W Fast forward | Go to next slide |
• EOL/•• PRIO | End slide show |
INS/OVR | Show/hide cursor |
Note
Philips cannot guarantee the proper function of all assigned shortcuts, since shortcuts can differ among versions and languages.
Program a custom profile
It is possible to program shortcuts for other applications to control application functions with the keys of the SpeechMike.
Make sure that the docking station is connected to the computer via the supplied USB cable and that the wireless connection to the SpeechMike is established.
Download and install the latest version of SpeechControl (Philips Device Control Center) from https://www.dictation.philips.com/speechcontrol.
Start Philips Device Control Center:
If the option to start the Philips Device Control Center automatically was selected during installation, open the program by clicking the
icon in the notification area of the Windows task bar.To manually start the program, open the Windows start menu in Windows and select Philips Speech Control > Philips Device Control Center.
On the tab Application control, click the Add button to create a new profile.
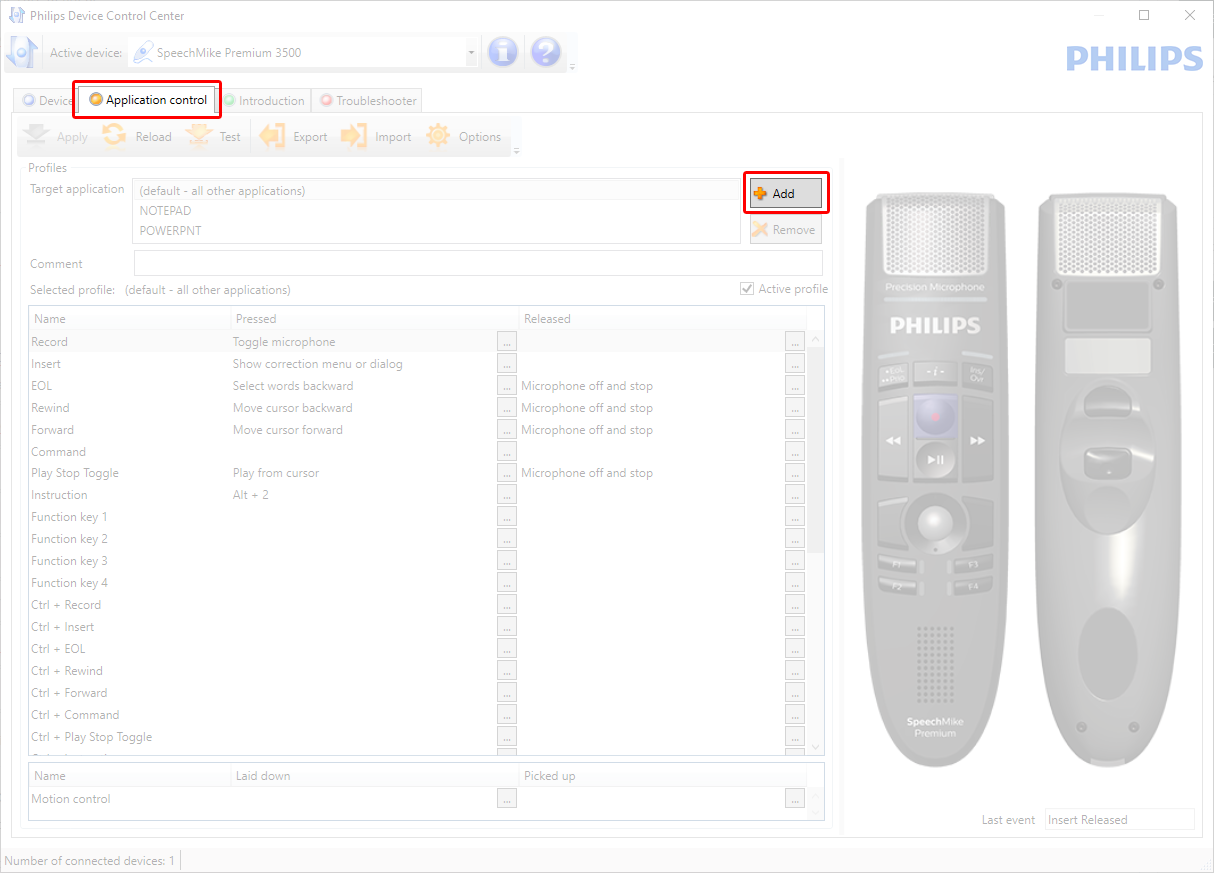
Browse and select the application executable and click on Open. A profile for the selected application will be added to the list of profiles.
Note
Exit the target application during configuration. Open the application when the device configuration settings are saved.
Select a button from the button column and click the
 icon to assign a shortcut. You can assign different shortcuts for pressing and releasing a key.
The shortcut editor window is displayed.
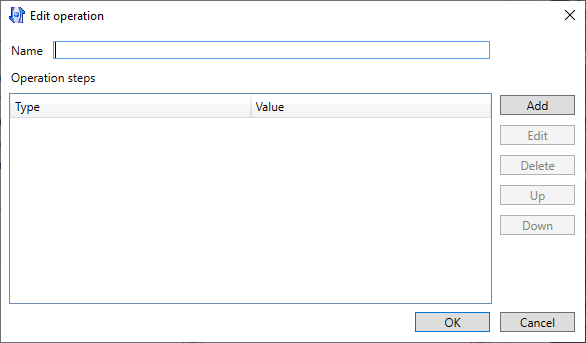
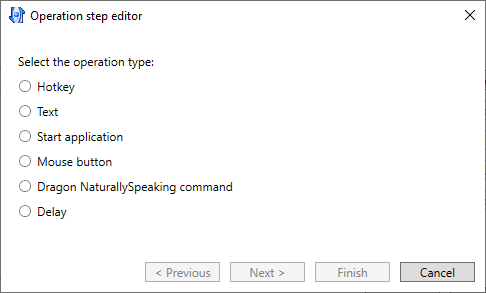
Enter name for the shortcut and click the Add button to add an operation for the shortcut. The following options are available:
Hotkey: Assign a keyboard shortcut
Text: Enter the text to be inserted when a key on the SpeechMike is pressed
Start application: Start an application by pressing a key on the SpeechMike
Mouse button
Dragon NaturallySpeaking command
Delay
You can add one operation or a sequence of operations for every shortcut.
Click the Finish button to save the new settings.
Note
The Device Control Center cannot be used to program application shortcuts for Philips SpeechExec software. Shortcuts for Philips SpeechExec can be configured in the General settings menu of SpeechExec. See the SpeechExec application help for more information.
Tip
Application control configuration settings can be saved into files and imported later to apply the same configuration settings to several devices.
Hands-free dictating with a Philips foot control
If you connect a Philips foot control, you can control the dictation functions with your foot control to have your hands free for your work.
Note
Before you connect the foot control to the docking station, make sure that the docking station is neither connected to the computer nor to the power outlet, as otherwise the foot control might not be detected.
Recording and playback of dictations with a Philips foot control requires dictation software such as Philips SpeechExec to be installed on the computer. When third-party dictation software other than Philips SpeechExec is used, driver software must be installed before connecting the SpeechMike and the foot control.
For best recording results during hands-free dictation, you will probably have to adjust the recording volume. You can set the recording volume in the audio settings of your recording application, e.g. Philips SpeechExec dictation software or Dragon NaturallySpeaking speech recognition software.
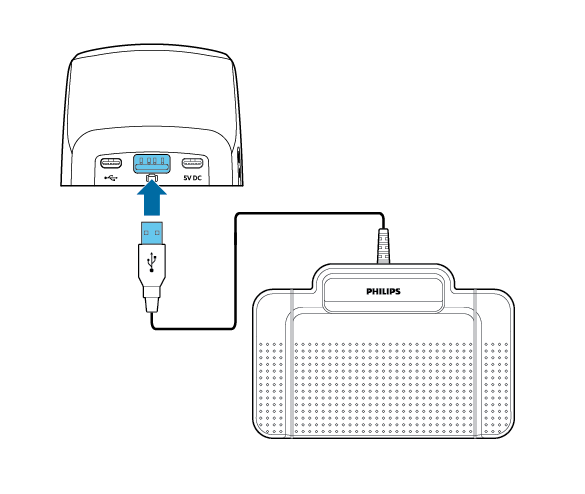
To connect a foot control for hands-free dictation:
Connect a Philips ACC2300 series foot control to the docking station of your SpeechMike.
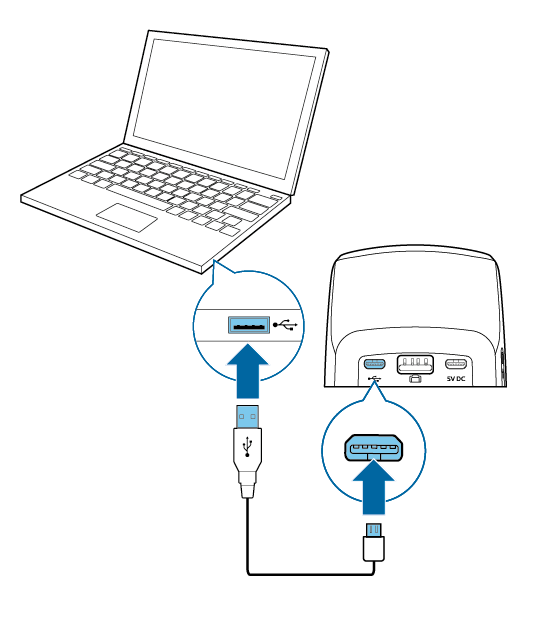
Connect the docking station to your computer.
Button assignment of Philips foot controls
Foot control ACC2310 / ACC2320
The Philips foot controls 2310 and 2320 have three pedals. By default, the foot controls 2310 and 2320 have the following configuration:
ACC2310
ACC2320
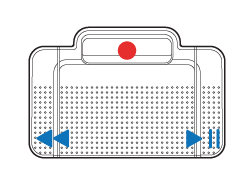
Foot control ACC2330
The Philips foot control 2330 has four pedals. By default, the foot control 2330 has the following configuration:
ACC2330
Upgrading the firmware
Your device is controlled by an internal program called firmware. As a part of ongoing product maintenance, the firmware is upgraded and errors are corrected.
It is possible that a newer version (an ‘update’) of the firmware has been released since you purchased the device. In this case, you can easily update your device to the latest version.
Use SpeechControl (Philips Device Control Center) to upgrade the firmware of your device. You can download the latest version of the application here: https://www.dictation.philips.com/speechcontrol. Please follow the steps outlined below to upgrade your device.
Note
A firmware upgrade is only possible if the following preconditions are met:
The SpeechMike has at least 50% (approx. 12 hours) battery power left.
The SpeechMike is not in idle mode.
There is no recording or playback running.
Firmware updates are not supported on ChromeOS.
To upgrade your device:
Connect the docking station to a power outlet and to the computer by using the supplied USB cables and the power supply unit. Then place the SpeechMike into the docking station.
Note
Make sure to upgrade your device together with all the accessories you are commonly using, including the docking station (or for some devices the optional remote control). If you are using your device together with the optional Philips AirBridge, make sure to also upgrade any other hardware you are commonly using with your device (e.g. the docking station).
Start Philips Device Control Center:
If the option to start the Philips Device Control Center automatically was selected during installation, open the program by clicking the
icon in the notification area of the Windows task bar.To manually start the program, open the Windows start menu in Windows and select Philips Speech Control > Philips Device Control Center.
Note
Make sure that you're using the latest version of Philips Device Control Center.
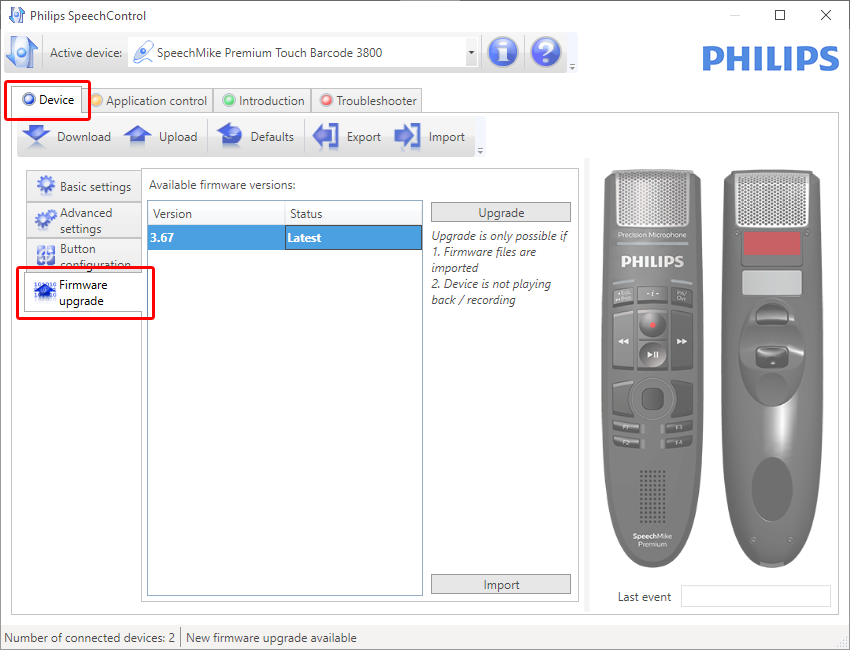
On the Device tab, click on Firmware upgrade.
Click on the desired upgrade version from the Available firmware versions list.
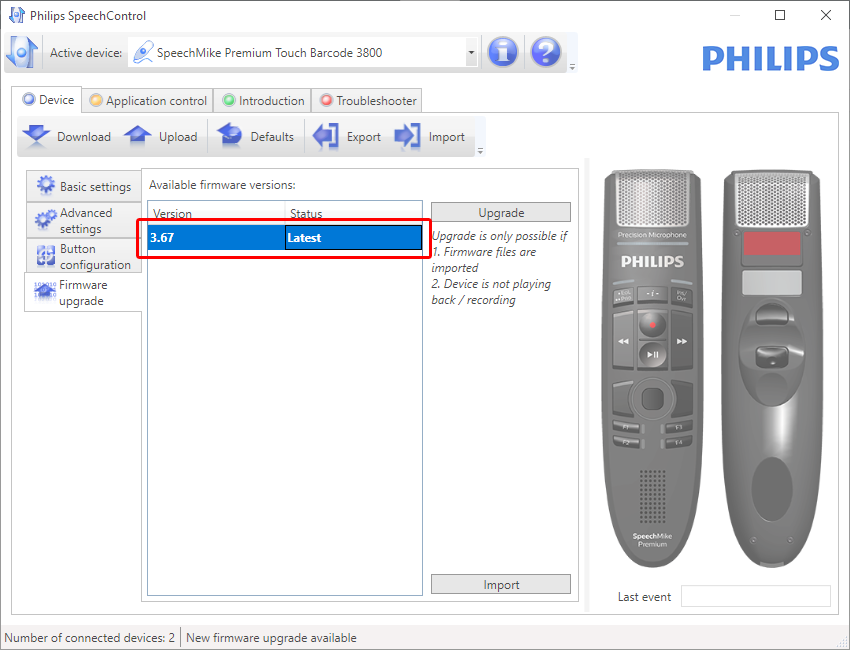
If the Available firmware versions list is empty, you can also manually check our website for firmware upgrades.
Download the firmware update for your SpeechMike model from www.philips.com/dictation.
Click the Import button and select the folder with the firmware files to be imported.
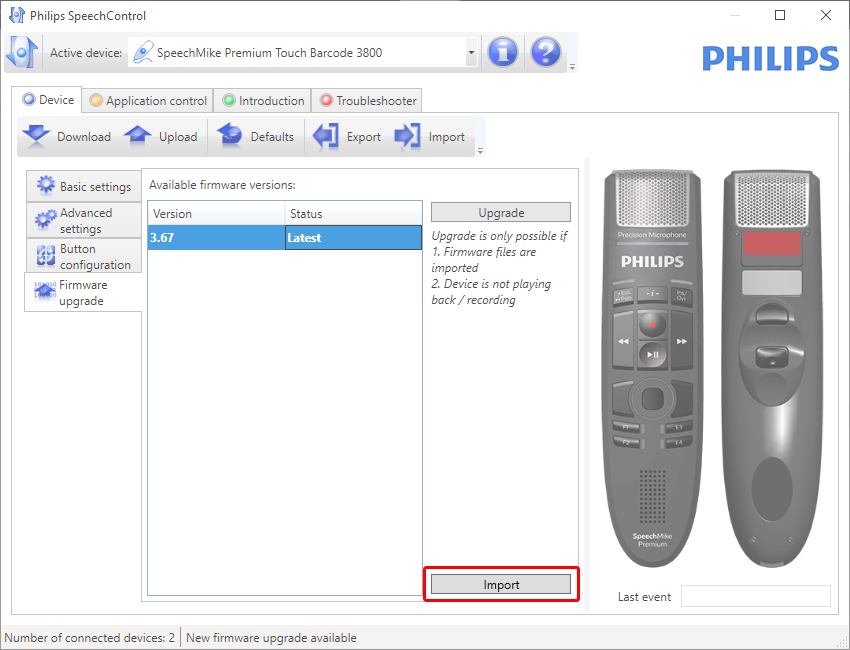
Click the Upgrade button.

Choose Yes, upgrade the device to install the new firmware.
The firmware upgrade takes about 30 seconds.
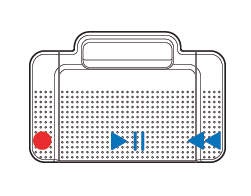
When the firmware upgrade is finished, the SpeechMike and the docking station are shortly disconnected and the wireless connection LED on both devices starts flashing red
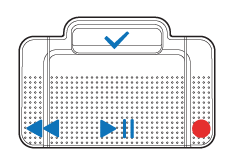
The pairing process starts automatically. When the connection is re-established, the wireless connection LED on the SpeechMike and the docking station glow green.
Caution
Do not disconnect the dictation microphone from the computer during firmware upgrade. This might damage your product.
Supported shortcuts
You can activate/deactivate some functions of your SpeechMike by pressing certain key combinations:
Function | Shortcut | Hold buttons for: | Indication |
|---|---|---|---|
Deactivate/activate the disable screen saver function. When this shortcut is active, the SpeechMike automatically slightly moves the mouse pointer every 30 seconds to prevent a screen saver from activating. | Trackball/Touch navigation + Left mouse button | 5 seconds | All F-LEDs light up for 0,5 seconds and the device beeps |
Deactivate/activate trackball/touch navigation and mouse buttons. With this shortcut, you can turn off/on the trackball or touchpad navigation as well as the left and right mouse button functions of the SpeechMike. When turned off, it means you can no longer move the mouse pointer with the trackball/touch navigation or use the mouse buttons of the SpeechMike. | Left mouse button + Right mouse button | 5 seconds | All LEDs light up for 0,5 seconds and the device beeps |
Deactivate/activate the mute motion REC function. When placing the SpeechMike on a desk the microphone is automatically muted. With this shortcut you can turn this function on/off. | F2 + F4 | 5 seconds | Off → On: The record LED lights up red for 1 second On → Off: The record LED lights up green for 1 second |